Close

My New Pattern Page

It is with great pleasure that I present to you my new and improved pattern page here at My Recycled Bags. With the help of my son, we have updated the old page with a thumbnail photo of each project and tutorial for easier access. The page is laid out by categories and materials now so you can quickly navigate the list of projects that you may be in search of.

It was fun and interesting as I went back over the nearly 5 years of patterns and posts that I have created here at my blog. I had forgotten about some of the older less used patterns as well as re-visiting the early creations I made with recycled materials.

So without further ado here is My Pattern Links page. I hope you enjoy using it and find it easier to locate my many different patterns that I provide free here at My Recycled Bags.

Homemade Laundry Soap

I have wanted to make my own laundry soap for so long. I finally assembled the materials and supplies necessary to make my first batch of homemade laundry soap. Below I have outlined the process and results I obtained from my first attempt at laundry soap making.

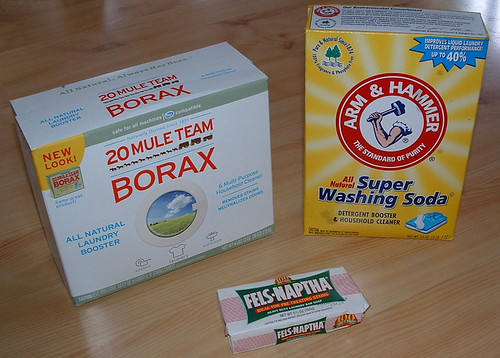
After researching and reading many blog posts about making ones own laundry soap, I settled on the recipe that uses washing soda, borax, and Fels-Naptha bar soap. There are many different recipes with a few different changes for each homemade laundry soap if you research it. I followed this blog’s homemade laundry recipe to make my laundry soap using the following supplies to make a 2 gallon bucket of soap.

Supplies:
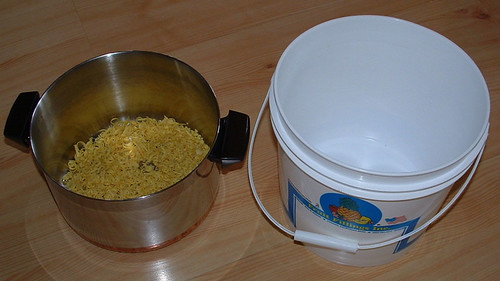
Large metal cooking pot at least 4 quarts or bigger
2 gallon plastic bucket for final soap container
1/3 bar of Fels-Naptha laundry soap
1/2 cup Arm & Hammer washing soda
1/2 cup 20 Mule Team borax powder

Directions:
Grate 1/3 of the bar of Fels-Naptha soap and place in cooking pot. Add 6 cups water and heat gently over low to medium-low heat stirring occasionally until the soap melts. Remove from heat. Then add the washing soda and the borax stirring until all ingredients are dissolved.

Pour 4 cups hot water into the plastic bucket. Now add the cooked soap mixture to the plastic bucket mix and stir well. Add 1 gallon plus 6 cups of water to the plastic bucket mix and stir well again. Let the soap mixture sit at least 24 hours to gel. It doesn’t gel to a firm consistency but more like a runny egg white. I use about a half of a cup of soap to wash in my extra large top loader washer. The soap works great on spots too if you just apply a bit to any stains on your clothes.

Below you will find additional photos that show each step from above. Click on any photo to super-size it.


Here is 1/3 of a Fels Naptha bar of soap grated and ready for the cooking stage.


6 cups of water added for the cooking stage.


Homemade laundry soap with all water added and stirred in bucket.


Final result of laundry soap after setting up for 2 days.

Bottom line on this homemade soap — I love it. It works well and if you add a half cup of white vinegar to your final rinse cycle you won’t have any static cling and my line-dried clothes were soft too. I do think when I make this again I will cut down on the water to make a more concentrated soap. My final soap mix was a bit too runny but still works fine. I think if you add just the 1 gallon of water at the end and eliminate the last 6 cups of water, you would end up with a much better consistency of soap. Also this laundry soap is a low sudsing soap so don’t be alarmed when you don’t see […]
Blocking a Crocheted Round Ripple Afghan

I recently crocheted a six point round ripple and the center was bowl-shaped. So I looked around for a picture tutorial on how I might block the crocheted afghan. I haven’t tried blocking an afghan before as usually they lay flat but this one had an issue and I was so hoping that I could straighten it out by blocking it.

After looking around the Internet, I read several different tips on how I might do the blocking but nothing with photos. Well as I’m a visual type person, I wanted photos with step-by-step instructions. After reading a few ideas, I set out on my own and created my own picture tutorial for blocking my rumpled-up afghan.

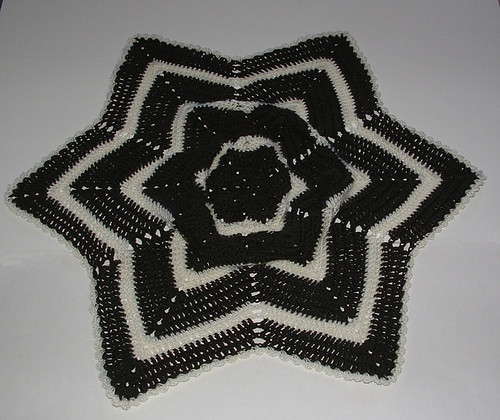
Here is my round ripple baby afghan before blocking. As you may see, the center is all rumped up and isn’t laying flat at all.

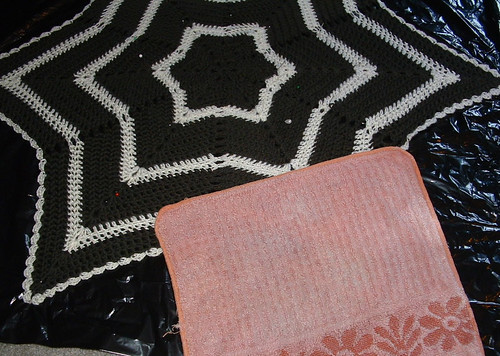
I put down a plastic garbage bag on the carpet and then placed my afghan on it. I gently stretched the points and center and then pinned it down into the carpet to flatten it. Put your pins in at an angle to hold down your blanket as you stretch it. Push down on the center to flatten it further and move your pins to stretch the afghan until it is laying down as flat as you can get it.

Next dampen your afghan with a wet cloth or use a spray bottle to gently wet the material. With the cloth or your hand, flatten the center down and move the pins as needed to stretch the blanket flat. Move the wet cloth around as shown to moisten the yarn so it blocks evenly.

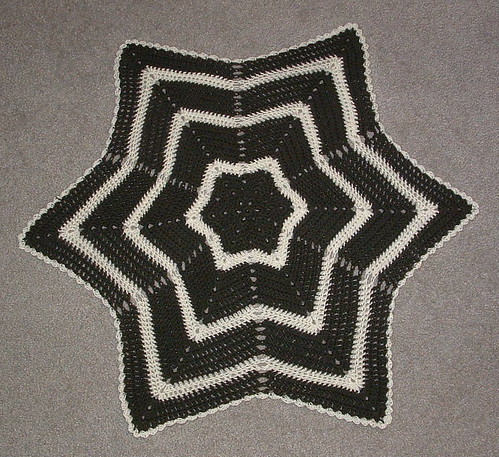
After dampening and flattening your afghan, allow it to dry completely before removing the pins and moving the blanket off the plastic. The next day my blanket was dry so I removed all the pins and the blocking was very successful as this baby afghan is relatively flat and looks much better now.

I hope you find this blocking tutorial useful. Blocking can be a great way to fix those round ripple and star afghans that just don’t like to lay flat after you finish them. Take heart and try my blocking tutorial to fix your projects should you need a little flattening.

Soda Pop Tab Bracelet

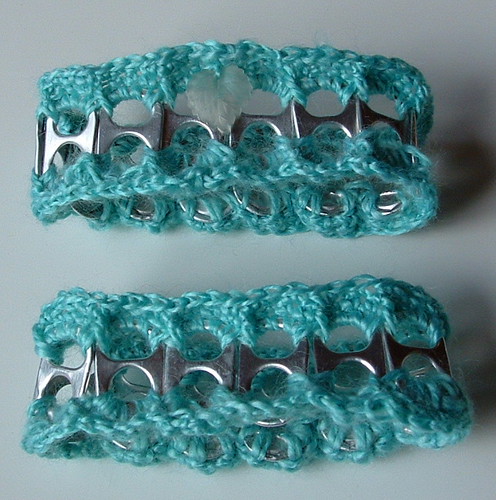
I present my first recycled soda pop tab bracelet. I crocheted these two bracelets using some lightweight yarn that I received in a swap. The yarn was a bit thin so I doubled it up to crochet these bracelets.

Here is the link for the original soda tab crochet pattern that my bracelets were based upon. My friend Kristy created a video which was really helpful for me to understand how to assemble the bracelet using the recycled soda pop tabs. You can view Kristy’s video tutorial below.

I used 12 tabs on one bracelet and 13 on the next one to make it a bit larger. I also added a leaf to the one stitch on the top bracelet. The original pattern calls for 12-14 tabs. Just check the fit of your bracelet as outlined in the video for the correct number needed for your project.

Recycled Egg Carton Fire Starters

Recycling egg cartons into fire starters is easy and a very frugal way to start your fire. Whether you are starting a fire in a wood stove or campfire, fire starters are always a handy thing to have on hand. I love making my own fire starters from recycled materials I have on hand.


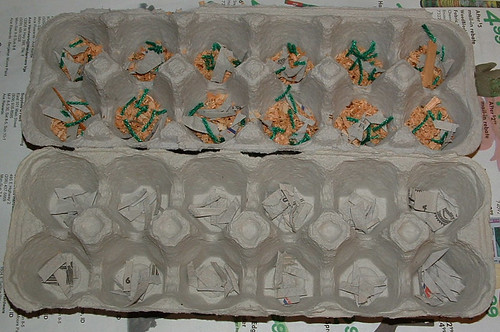
I use old egg cartons for my base and then add bits of burnable materials such wood shaving from a chain saw, pencil sharpener, or a miter saw. I put some wood shavings in the bottom of the egg carton holes and then added bits of cut up cardboard and scraps of cut up yarn. The added scraps of materials make your fire starters easier to light and help the burning process to produce a great fire starter.


Next I melted leftover wax from an old candle in the glass container it came in. I placed the glass jar in some water in a sauce pan. Over gentle heat, warm the wax until it melts. I added more bits of old wax to the jar as needed to cover the materials in my egg cartons. I used an old spoon to dribble the wax over each fire starter in the egg carton.
Click on photos to supersize

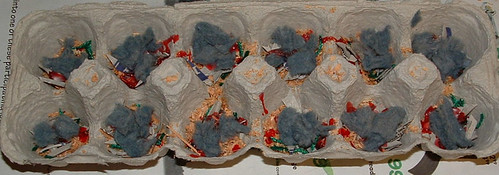
I added some lint from my dryer in one egg carton set as shown above. Dryer lint burns well and is a wonderful material to use for making fire starters.


I dribbled more wax over my fire starters and here is the final results. Now just separate the individual filled egg holders from each other which results in 12 very wonderful fire starters.

Closeup of the finished fire starters made from recycled materials.