Close

Cassette Tape Sachet

I’m back to share my latest recycled cassette tape craft project. I crocheted this little sachet bag with two strands of cassette tape along with one strand of ribbon yarn. The ribbon yarn gives the cassette tape a better texture to crochet with and makes the crochet hook move more easier.

I added a sachet liner that I crocheted from some cotton thread so you could remove it from the cassette tape sachet. I filled the liner with some spicy potpourri before closing the end up. Then I just inserted the liner inside the sachet.

This is a quick and easy recycled crafting project which requires just a small amount of materials. The result is a pretty sachet that makes a great gift idea.
*******************************************************************************************************************************
Free Cassette Tape Sachet Pattern

Materials needed:
2 Cassette tapes (only 1/8 of a reel used on each)
1 oz Lion Brand Lion ribbon yarn
One bead for drawstring
Small amount of #10 Cotton thread for liner

Hooks:
J (6 mm) U.S. size metal crochet hook
C (2.75 mm) U.S. size metal crochet hook

Description: Crocheted Sachet Bag –
Bag measures 4-1/2 inches wide and 5 inches long

Directions:
Ch 15

Rnd 1
Hdc in 2nd ch from hook and in ea chain st down to end. Then continue around other side of chain by working a Hdc in ea st to other end.

T-Yarn Swiffer Sock

Need a swiffer duster sock? Well I did for my Unger so I cut up one white t-shirt and a small amount of a blue jersey sheet to crochet my duster cover. I cut my t-yarn 1 inch wide and stretched it gently as shown in my t-yarn making tutorial.

My Unger is a squeegee with a swiffer-like head on the other side. I want to be able to use the other side to dust and clean high areas in my house with the extended handle on the Unger.

I used the Craftstylish crochet reversible swiffer pattern as a basis for my duster cover. Because my tool is narrower than a Swiffer, I had to modify the original pattern. The beauty of the pattern is that it is easily adjustable to fit different sized cleaning tools. The pattern has great pictures and works up really quickly.

Okay now for my modifications:
I used N (9 mm) crochet hook. I chained 19 to begin my cover. I only crocheted 3 rows of ruffles in the middle. Then one round of SC in each stitch and then several decreases of Sc on last round to fit my Unger.

Finished size: Fits a tool head 10 inches long and 1-1/2 inches wide when stretched.

My finished t-yarn cover turned out perfect and I love the ruffles on the duster. It works great and I plan to use the same ruffle design to make a mop cover. Using recycled t-shirts for this project worked wonderfully as the cotton is soft and absorbent. Now I just need to get busy and do some cleaning with my new tool.

Plarn Pop Tab Tote Bag


This week I present my first pop tab tote bag project. I was asked to create a tote bag using soda pop pull tabs and recycled plastic bags by a member of my Trash to Treasures group on Ravelry. I have been saving soda pop tabs and beer pull tabs so I could complete this project. It took 252 tabs for my bag. I decided that I would alternate rounds so that it didn’t take so many tabs to do this bag. Plus I like the look of the plastic bags by themselves to separate the pull tab rounds.

I used cotton cord on the base of the bag to give it a sturdy bottom and also on the handles. I found if I wrapped the plastic bag yarn (plarn) around the cord as I crocheted around it, it hides the white cord better. As you may see in the closeup pictures of the base, the first few rows I didn’t wrap it as close as I did in later rounds. The later rounds look better and the white cotton cord doesn’t really show through. I found if I wound the plastic around the cord in small sections and then crocheted around the cord, it worked best to keep the plastic tighter and uniform.

Hope you enjoy this free crochet pattern. Happy 4th of July to everyone!

*********************************************************************************************************************************
Free Plarn Pop Tab Bag Pattern

Materials needed:
One ball of plastic bag yarn aka Plarn
(Approx. 50 plastic newspaper bags cut into 1″ strips of plarn)
252 Soda pull-tabs
4 yards – 12/32 (9.5 mm) cotton cord

Hook: J (6 mm)size metal crochet hook
Description: Plastic Bag & Pop Tab Tote Bag
Bag measures 12 inches wide and 10 inches long with 18 inch straps

Directions:
Ch 20 loosely.

Recycled Kleenex Box Gift Tags


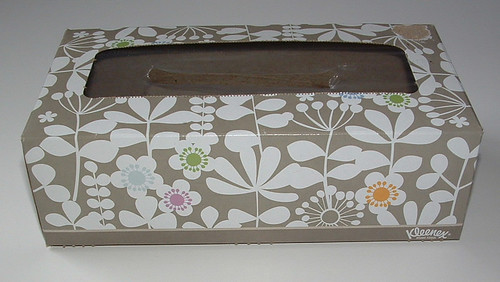
Here are some gift tags I made from a pretty Kleenex box I had. The box was just so cute that I wanted to recycled the cardboard into something useful so I got out my tag die cutter. I cut as many tags as I could from the panels of the box and then used a hole punch to put a hole into the top of the tags. I used scrap yarn and some leather strips for ties to finish off my gift tags.


Here is one other set of gift tags I cut from another Kleenex box. The bottom had some plain white so I cut out a few of those to show you that with some pretty yarn, they make great gift tags too. For the other tags, I used pieces of plarn (plastic bag yarn) for my ties.

This is a really quick and easy project that you and the kids can both enjoy. Let the kids cut strips of yarn or other recycled materials for the ties and voilà — you have yourself some cute and free gift tags.

Altoids Pincushion Tin

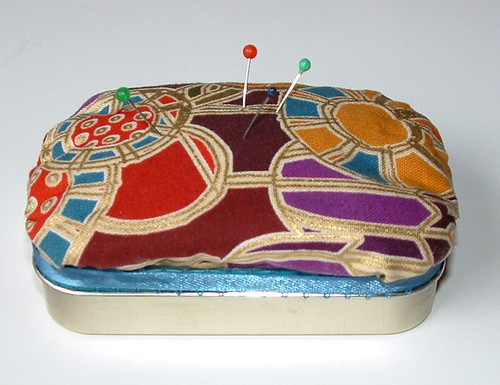
Here is my version of an Altoids tin repurposed into a pincushion and sewing gadget box. The materials used in this project were from an Envelope of Doom (EOD) swap I participated in. If you aren’t familiar with an EOD swap, its where you put some crafting materials into an envelope and mail them off to your partner. The challenge is to use the materials you receive to make things for your partner and then return the finished items back to your swap partner. It was a fun swap and this pincushion sewing box was one of my creations from the materials I received from my partner.

I was inspired by this Altoids project which used a magnetic sheet on the inside of the lid to hold needles and such. There are lots of different crafting versions and great ideas on the web for reusing the tins.

Over at Craftsters Rackycoo’s tutorial is outstanding and has step-by-step photos showing how to decorate your tin. I used a few ideas from the post to finish off my Altoids pincushion box.

I hope my swap partner will enjoy her recycled Altoids tin as much as I did creating the little sewing box. Until next time, happy crafting to all!