Close

Variegated Plarn Tote Bag
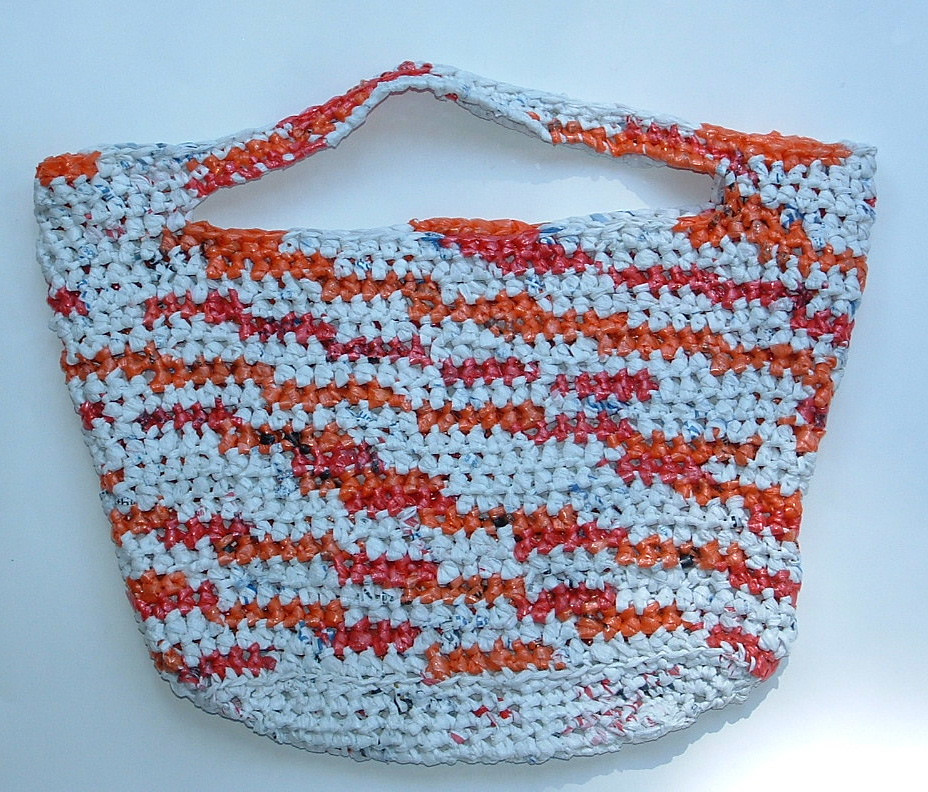
I present my latest creation — Variegated plastic bag yarn or plarn as it so commonly is known as in the crafting world. Pink, orange, and white plastic bags were used to crochet this variegated recycled bag. The pink and orange bags are plastic bags that newspapers are delivered in and the white is from just regular retail bags. I used these 3 colors to create my variegated look by assembling 3 loops of pink plarn, 2 white loops, 3 orange loops, and 2 white loops, then repeat this order for the variegated look. Here is my plarn making tutorials for creating yarn from newspaper or retail plastic bags should you need to see how to make plastic yarn.


This plarn ball was made using newspaper and retail bags together to create the variegated colored yarn. As I outlined below, if color pooling becomes a problem just add another white strip of plarn to offset the pooling. I found if I added an additional white strip to the 2 white ones, it solved the pooling issues with the tote bag as I crocheted it.

Enjoy the free crochet pattern below and happy crafting to all!

**********************************************************************************************************************************

Variegated Plarn Tote Bag Pattern

Materials needed:
Plastic bag yarn or Plarn – Approx. 50 white plastic grocery bags along with 20 pink and 20 orange plastic bags for the variegated yarn

This variegated plarn is created by assembling 3 loops of pink plarn, 2 white loops, 3 orange loops, and then 2 white loops, repeat pattern for variegated look.

Hook: N (9 mm) size metal hook

Description: Recycled Plastic Tote Bag
Bag standing up measures 14″ wide and 11″ tall with 12″ handles
with measurements flat 17″ across, 12″ high, and 11″ long base.

Directions:
The bottom of bag is crocheted with just plain white bags. Using just white plarn, Ch 20.

Rnd 1
Sc in 2nd ch from hook and in ea chain st down to end. Continue around other side of chain by working a Sc in ea st to other end.
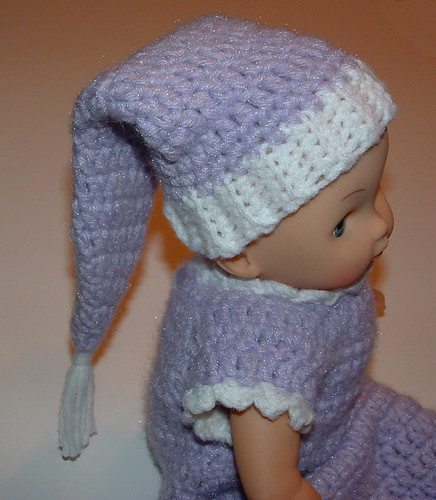
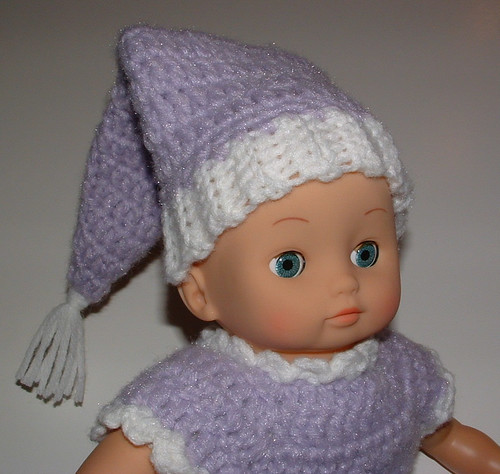
Doll Stocking Cap

I designed this doll stocking cap as a sleeping cap for a baby doll. It fits a 12-13″ doll with a head circumference of 10-1/2 inches around. I wanted to share this quick crochet project as it’s a fun little hat to add to a baby doll clothing set. I crocheted this hat to go along with the doll bunting outfit I made for my granddaughter’s doll.

*******************************************************************************************************************************************

Doll Stocking Cap Pattern

Fits a 12-13 inch doll or any doll that has a 10-1/2 inch head circumference
Hat measurement flat: 4-7/8 inches wide across opening and 10 inch long
Hook: Metal G (4-4.25 mm) sized crochet hook

Materials:
1 to 1-1/2 oz – worst weight yarn (Vintage Purple Puff WW)
Small amount of white yarn for ribbing band and tassel

Directions:
Using white yarn Ch 7.

Plarn Scrubbie Coral


I crocheted these scrubbies using recycled plastic bags that were cut into plarn. It reminds me so much of sea coral that I just had to call the scrubbers scrubbie coral. The inspiration for these scrubbies came from my friend Kristy who shared her cotton scrubbies at her blog Texiles4you.

People ask me all the time about the amount of plarn created by each plastic bag and while it may differ with one type of plastic bag to another, I found the standard white retail bags yield me about 7 yards of plarn when cut them 1″ wide and assembled using the looping method. The orange plastic newspaper bags provided me with 6 yards due to their smaller size.

With that in mind, you need 4 plastic bags to make each one of these scrubbies. The white scrubbies were crocheted just 4 rounds. I found I liked a bigger scrubbie so I crocheted the orange one five full rounds. By crocheting 5 rounds you use all of the plarn created from the 4 plastic bags where the smaller scrubbers only use a little over 3 bags.

You will find as your crochet each round that it begins to twist which is normal. The more rounds you crochet, the more twist you get. Have fun with the colors and mix and match them. I plan to crochet more of these scrubbies and add a different color just on the final round which should create an even more unique coral look for the scrubbies.

***************************************************************************************************************************
Plarn Scrubbie Coral Pattern

Materials needed:
Plastic bag yarn or Plarn 4 plastic bags cut into 1 inch wide strips
as shown in my plarn making tutorial

Hook: N (9 mm) size metal hook

Description: Recycled Plastic Scrubbie
Scrubbies are about 3-1/2 – 4″ wide depending on if you do 4 or 5 rounds

Directions:
Rnd 1
Ch 2 and work 8 Sc in the 2nd ch from hook. Do not join and continue working in rounds. Use a stitch marker if necessary so you know where each round starts.

Rnd 2
Work 2 Sc in each st.

Rnd 3-5
Work 3 Sc in ea st.
Option: For a smaller scrubbie, crochet just 4 rounds.

If you have any questions or find discrepancies in this pattern, please email me using contact tab above.

Abbreviations:
Ch – Chain
Ea – Each
FO – Finish Off
Hdc – Half Double Crochet
Inc – Increase
Plarn – Plastic Bag Yarn
Rnd – Round
Sc – Single Crochet
Sk – Skip
Sl St – Slip Stitch
St – Stitch

This pattern is copyrighted by Cindy of My Recycled Bags {dot com} and may only be used for private individual use. No commercial sales or use is permitted. Links to this pattern are acceptable. ©2011

****Please do not copy my patterns on your blog site or post my patterns on Internet sites. I do not allow my patterns to be republished without expressed written permission. Posting of my patterns, without […]

Homemade Laundry Soap

I have wanted to make my own laundry soap for so long. I finally assembled the materials and supplies necessary to make my first batch of homemade laundry soap. Below I have outlined the process and results I obtained from my first attempt at laundry soap making.

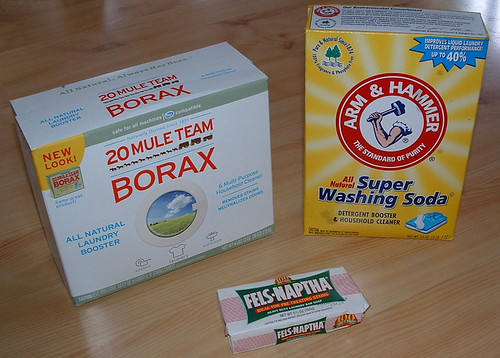
After researching and reading many blog posts about making ones own laundry soap, I settled on the recipe that uses washing soda, borax, and Fels-Naptha bar soap. There are many different recipes with a few different changes for each homemade laundry soap if you research it. I followed this blog’s homemade laundry recipe to make my laundry soap using the following supplies to make a 2 gallon bucket of soap.

Supplies:
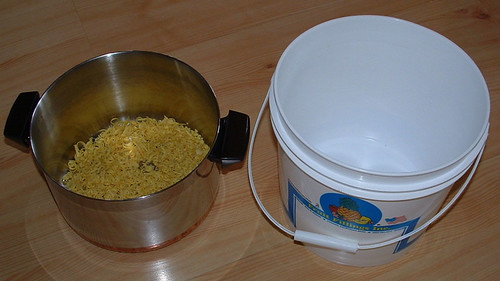
Large metal cooking pot at least 4 quarts or bigger
2 gallon plastic bucket for final soap container
1/3 bar of Fels-Naptha laundry soap
1/2 cup Arm & Hammer washing soda
1/2 cup 20 Mule Team borax powder

Directions:
Grate 1/3 of the bar of Fels-Naptha soap and place in cooking pot. Add 6 cups water and heat gently over low to medium-low heat stirring occasionally until the soap melts. Remove from heat. Then add the washing soda and the borax stirring until all ingredients are dissolved.

Pour 4 cups hot water into the plastic bucket. Now add the cooked soap mixture to the plastic bucket mix and stir well. Add 1 gallon plus 6 cups of water to the plastic bucket mix and stir well again. Let the soap mixture sit at least 24 hours to gel. It doesn’t gel to a firm consistency but more like a runny egg white. I use about a half of a cup of soap to wash in my extra large top loader washer. The soap works great on spots too if you just apply a bit to any stains on your clothes.

Below you will find additional photos that show each step from above. Click on any photo to super-size it.


Here is 1/3 of a Fels Naptha bar of soap grated and ready for the cooking stage.


6 cups of water added for the cooking stage.


Homemade laundry soap with all water added and stirred in bucket.


Final result of laundry soap after setting up for 2 days.

Bottom line on this homemade soap — I love it. It works well and if you add a half cup of white vinegar to your final rinse cycle you won’t have any static cling and my line-dried clothes were soft too. I do think when I make this again I will cut down on the water to make a more concentrated soap. My final soap mix was a bit too runny but still works fine. I think if you add just the 1 gallon of water at the end and eliminate the last 6 cups of water, you would end up with a much better consistency of soap. Also this laundry soap is a low sudsing soap so don’t be alarmed when you don’t see […]

Diagonal Potholder & Dishcloth Set

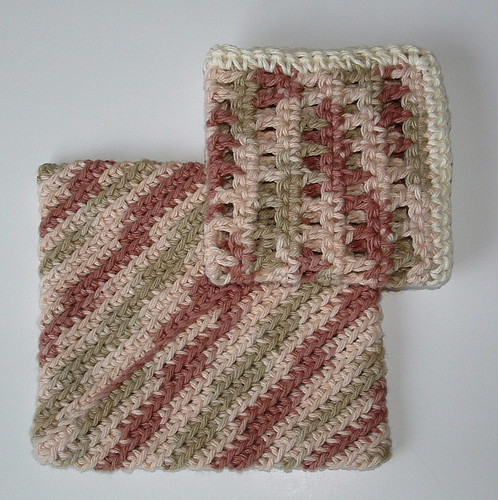
This week I am sharing my diagonal potholder and dishcloth set. I previously have attempted to crochet a diagonal potholder without much success. You probably have seen several different versions of this potholder pattern that you crochet on the diagonal. I have tried before to crochet one of these but it just didn’t turn out right. Well I decided after reading another crocheter’s blog about using the double thick potholder pattern with success that I would give the pattern a try.

My first attempt turned out okay but the potholder was way too small for my liking. So then using a H crochet hook, I chained 32 stitches to begin the pattern. The result is the potholder shown which is about 5-3/4″ square. I like this size much better and the corners are pretty straight. If your diagonal potholder isn’t real square, just try pulling on the corners as this helps straighten out the corners. I added a dishcloth using my open mesh magic dishcloth pattern to complete the matching set.

It’s been a busy week and I wanted to share some crocheting with you all. I will be back next week with a new pattern as I have been working on several new projects but just didn’t get any new patterns written and pictures taken yet. So until next time, happy crafting to all!