Close

Ana Sweater Shell

I present my crocheted toddler sweater vest shell. I have named this project the Ana Sweater Shell in honor of my sweet Granddaughter who this sweater was created for. The sweater is worked from the sides rather than from top to bottom as is with most crochet patterns. Because it worked with the stitching running up and down, it provides a unique and easy to finish crochet project.

I first saw this idea from a sweater shell that Guro crocheted over at her blog but she did not have a pattern written up. Well after checking with Guro, she said to just go ahead and feel free to be inspired by her project so this is my results. I worked my vest shell in half-double crochet stitching while hers was done in single crochet.

I really love this sweater as it is so versatile. It can be worn as a vest over a t-shirt or blouse and it can also be worn as a shell alone in warmer temperatures.
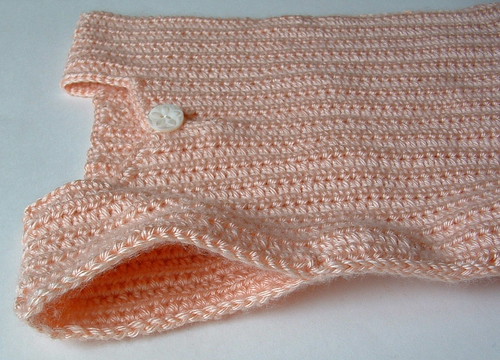

Click to Super-Size

My vest shell is about a children’s size 3 and should fit a toddler who is around 2 years old. It has a longer body so it’s a nice length for a toddler. The vest fits my Granddaughter who is 15 months old. The pattern has been written up and while I have not tested it, I believe it’s pretty solid but please email me if you have any questions or find any errors in my free crochet pattern below.

___________________________________________________________________________________________

Crocheted Toddler Vest or Shell Sweater Pattern

Finished toddler vest measures: 12 inches wide by 14 inches long
Size: Children size 2-3

Hook: Metal G (4-4.25 mm) US sized crochet hook

Materials:
6 ozs Caron Simply Soft Yarn in Lt. Country Peach
(315 yards/288 meters of 4-ply worst weight yarn)

1 inch Button for front closure

Row 1 (Back piece)
Ch 57
Crocheted Neck Wrap Scarf


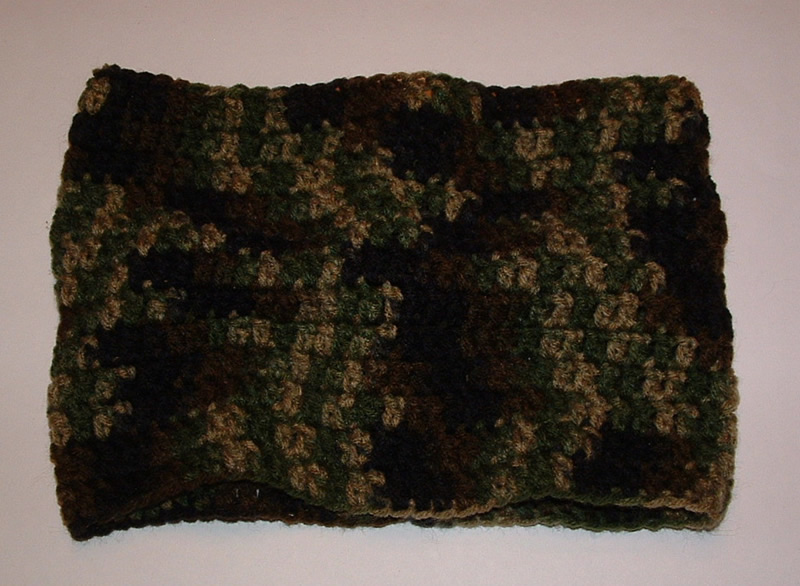
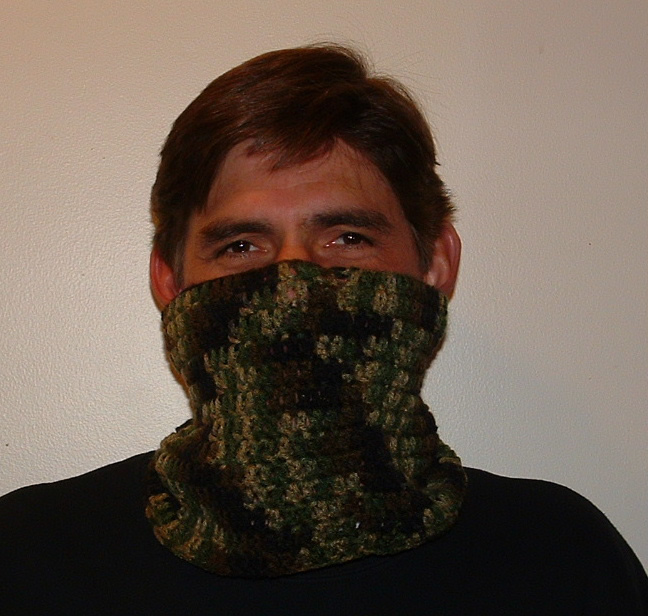
I present my crocheted neck wrap scarf. It is crocheted in the round and just slips over your head. As shown, it can be worn up over the chin and nose. It would make an excellent neck warmer and face warmer for winter and for snowmobiling.

You can make it smaller and larger as desired by just adjusting your beginning chain. I have made several of these and found the snugger fitting ones work better for staying up on the nose. You can wear it just around the neck but this scarf gives you the option of pulling it up around the chin and nose to keep you extra warm.

This is a very quick and easy project that uses less than 3 ounces of worst weight yarn. These neck wrap scarves make excellent gifts and would be a great Christmas gift too. Enjoy the free crochet pattern below.


Crocheted Neck Wrap Scarf

Finished adult scarf measures: 11 inches wide by 7-1/2 inches long
Hook: Metal G (4-4.25 mm) sized crochet hook
Materials: 3 oz Camo Super Saver Worsted Yarn

Rnd 1
Ch 65 loosely and then join to the beginning to create a circle. Be carefully that your chain is not twisted when you join the first round. […]

T-Shirt with Crocheted Yoke

This month’s challenge over at Trash to Treasures on Ravelry has been to do a wardrobe re-do. This means to take some old clothing item and transform it into a new and useful item. I have had this striped t-shirt that I have been saving just for such a project. The neckline was frayed and this old tee needed to be upcycled into a new shirt.

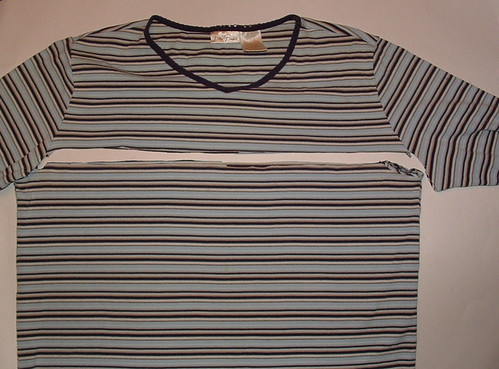
Here is the before photo of my t-shirt.

Next I cut off the top of the shirt as shown.

I loosely followed the Drop’s crocheted yoke pattern that was added to the top of a knitted sweater for my project. I first zig-zagged around the top cut edge of my shirt to prevent it from unraveling. I ended up running around the top edge twice just to make sure the seams wouldn’t fray. I chose Lion Wool yarn in midnight blue and it took just one skein (3 ozs) to completed my yoke. Using a #7 steel crochet hook, I worked around the top edge by poking a hole and pulling my blue yarn through the hole. I did a single crochet stitch evenly all long the front, underarms, and the back of the shirt. I used a G hook from this point on.

Once my base row was completed, I needed to reduce the number of stitches around, so I work 2 single crochet stitches together around the entire next round. I then worked round 3 with a double crochet in each stitch and chain 30 (8-1/2″ long) for the sleeve opening on each side of my shirt. From here I worked more decreased evenly over the next rounds while somewhat following the chart in the Drops Design pattern. I did find I had to make more decreases to get the yoke narrowed down but in the end it turned out nicely.


Here is my final crocheted yoke photo. The dark wool just doesn’t want to photograph very clearing but you can click on the photos to supersize them. So if you have an old t-shirt, consider adding a crocheted yoke to give it a new look like I did in this wardrobe re-do project.

Dishcloths and Plastic Scrubbies

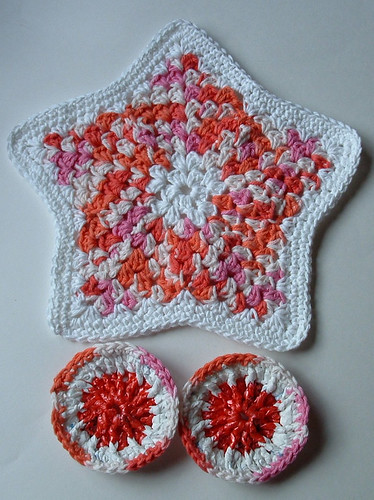
Here are a few dishcloths I crocheted along with some recycled plastic bag scrubbies. I purchased this large clearance skein of Bernat cotton yarn and have been making kitchen sets with the cotton. I crocheted the plastic scrubbies and then added a final round on the scrubbies using the cotton so it matched the dishcloth.

To the right is my star dishcloth pattern but I did the two final rounds by working Sc’s in each stitch and 3 Sc’s in each point of the star. I thought by working the last few rounds in single crochet with white cotton yarn that it added a nice finish to the dishcloth.

The scrubbie dot pattern was adapted by using plastic bags cut into 3/4″ wide strips to create plarn and then using a “J” hook, I crocheted the pattern as written except for the final round which I used the cotton yarn to match my dishcloth.


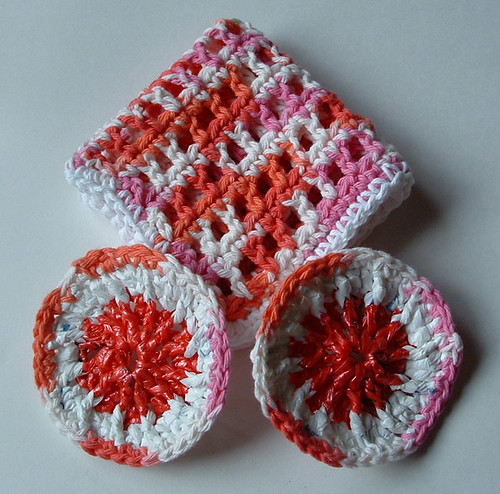
Here is my open mesh magic dishcloth pattern using the same cotton yarn. The scrubbers were again plastic bags with the final round done in the cotton yarn to match.

So if you want to crochet some recycled plastic bag scrubbies, consider adding a final round of cotton yarn to them so they can match the dishcloth to create a unique kitchen set. These make excellent eco gifts and people really find the scrubbies handy.

Felted Cell Phone Cozy

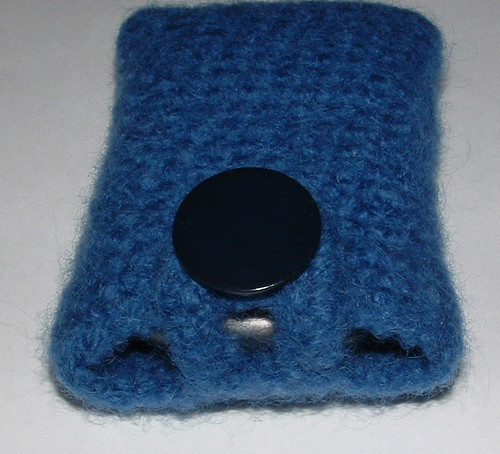
You know if you have been reading this blog site for awhile that I’m all into being practical and creating things I need. So I really wanted to have a nice little cell phone holder and I just love felting so I crocheted myself this little cell phone cozy from some scrap wool yarn.


_______________________________________________________________________________________________

Free Felted Cell Phone Cozy Pattern

Crochet this cozy using about an ounce of 100% wool yarn with a G (4mm) crochet hook. Chain 14, single crochet (sc) in 2nd stitch from hook and in each stitch down to end of chain (13 sc). Working around the back side of chain, sc in each stitch to create a seamless cozy. Do not join. Continue working in rounds until your cozy measures 4-1/2 inches long before felting (approx. 19 rounds.) Slip stitch into last few stitches of final round so your finished edge is smooth. Fasten off and weave under ends on the inside of your cozy. Finished size before felting was 3-1/2 inches wide by 4-1/2 inches long.

Buttonhole Loop:
Join yarn with slip stitch in 5th stitch from edge and ch 15. Attach in the 2nd stitch over from loop base to create the buttonhole with a slip stitch. Then Sc back up the chain evenly (approx. 18 Sc’s.) Join with slip stitch back into the beginning with a slip stitch. Finish off and weave under ends.

Felting:
Place your completed cozy inside an old pillowcase and tie it closed with a knot. I felted my cozy 15-20 minutes on the hottest water. Check your cozy after 10 minutes of agitation to make sure it hasn’t felted too much to fit your cell phone. Mine needed more so I put it back into the washer. After a total of 20 minutes, mine was perfect. I pulled it out and cold water rinsed it in my sink. Shape your cozy so it’s square and check to make sure the opening is wide enough to insert your cell phone. If it’s a bit tight, just stretch the opening a little. Air dry and shape as it dries if needed.

My final felted cozy measures 3 inches wide by 4 nches long which fits my Motorola cell phone that is 2-1/4″ wide by 3-3/4″ long. This cozy is a great way to use up scraps of wool yarn you may have on hand. Just make sure you use 100% wool so your project felts properly.

Once your felting is done and its dry, add a 1 inch or larger button as desired to the front of the cozy. Voila you are done — Enjoy your felted cell phone cozy!