Close

Plastic Plarn Scrubbie Dots

Here are my colorful plarn scrubbies I crocheted using Doni’s scrubbie dots pattern. I used a “J” (6 mm) crochet hook and followed her pattern instructions using recycled plastic bags cut about 3/4″ wide as shown in my plarn-making-tutorial. The finished dimensions for my scrubbies are 4 inch wide if you follow the exact pattern directions but use plarn instead of cotton yarn.

I just love this quick and so cute pattern. The nice thing about these scrubbies is that they only take about 2 colored and two white plastic bags to crochet each scrubbie. If you are like me, it’s hard to get colored bags so this is the perfect recycled crafting project to use those uniquely colored bags.

Enjoy this pretty and very useful crochet pattern. Have fun experimenting with colored bags to create your own unique recycled scrubbie!

Two Years Later

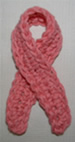
Two years ago today, I was told that I had breast cancer. I will never ever forget the feelings and utter terror I felt that day. My mind ran through all the different scenarios and I faced some of the most terrifying moments of my life after my diagnoses. As I look back, its the unknown that was the worst. It’s not knowing what the outcome would be and questioning myself about my strength to face this beast.

I have heard many people say that battling cancer makes you a better person. You don’t take things for granted. You love your family a bit deeper and you know how fragile your good health can be. You face your fears. You endure surgery, chemo, hair loss, and radiation. You fight to get well and get your life back as you once knew it. And you remember to enjoy each and every precious minute of your life.

Sure it’s been hard, I won’t try and sugar-coat cancer. There is nothing sweet about it. It tears you and your family apart and you are never the same again. Yes you can get better and yes you learn that you can face your worst days. You heal and become a stronger person for all that you have experienced. You find a new strength within yourself and you move on.

So as I look back on this two year cancerversary, I am thankful to God above and feel blessed that I’m cancer free now. I look forward to many more years of good health, loving my family, and enjoying my life. I know that I am stronger and that I can and have faced cancer. I move on now with a new sense of courage and conviction.

In closing, I want to express my gratitude for all your love, support and prayers. You have all helped me more than you will ever know to be able to endure and succeed in this journey that I began two years ago. Thank you all!

Pink Baby Sweater Jacket

Here is my latest baby wearable I made for my granddaughter. I crocheted this cute pattern by Beverly called Cat’s Meow Toddler Jacket using Bernat Baby Jacquards. It is a fairly easy pattern but I did have some questions and I thought I’d clarify a few issues that I had as I worked the pattern.

First I wasn’t sure what the pattern was referring to when it read “Work over 26 patterns for 3 rows” after you finish the sleeves. I figured out it was talking about the vertically rows that this stitch pattern forms as you crochet the repeat pattern. I counted over 26 pattern rows which was about 10-1/2 inches from the sleeve edge and 4 inches from side edge in to neck.

Next I found that the border needs to start on the left side as you are looking at it which is the actual right hand side of sweater. I also found that it was easier for me to do the buttonholes on the right side of jacket by starting from the top edge and working down. Because I started at the top, I worked single crochet (sc) stitches in the first 8 stitches from the collar down to the first buttonhole. Then I worked the first buttonhole ch 2, skip 2 sts, and then worked sc in the next 8 stitches and repeated down to bottom of the right side.

I finished off the border by working a sc around in each st and 3 sc in corners the same as row 4 calls for in the pattern. I worked the collar’s first row by sc in each st and then skipping every 4th stitch but then I worked the remaining rows of the collar by sc in each stitch and 3 sc at collar points. I edged my sweater jacket with white contrasting yarn by working sc around the collar and cuffs and then I crocheted the ruffled edging around the rest of the sweater.

I hope my notes may help anyone else that may have questions working this pattern. It’s really an adorable finished baby jacket and I can’t wait to see my sweet granddaughter model it.

Thrift Store Sweater Upcycled

Recycling thrift store sweaters is a great way to reclaim some nice yarn at a reasonable price. I recently picked up this mohair blend sweater from my local thrift store with high hopes to unravel the yarn. Well I soon found out that this sweater didn’t want to unravel and appears to be an interlocked knit.

I put on my thinking cap in an effort to upcycle this old sweater into some new and useful items. First I used the lower portion of the sweater to create a scarf cowl. Using some scrap yarn, I added two rows of single crochet along the lower edges to finish off the raw edges where the sweater body had been attached. My upcycled cowl was finished off with some wooden buttons from my stash.

Next I tackled using the sleeve as a plastic bag holder. The natural cuff on the sweater was perfect for transforming the sleeve into a handy bag keeper. As shown in the pictures, I folded under the top of the sleeve to the inside. Using a basting stitch, I sewed around the top edge about 1 inch from the top to create a casing for the ribbon tie closure. I machine stitched the basting to hold the fold in place and also so I could crochet in a straight line to create my casing. I left the back of the casing open where the sleeve seam is. Then using a small D crochet hook and some scrap brown yarn, I worked a slip stitch over the basting and through both layers to create my casing for the ribbon tie closure. See photos below and you can click on any other them to enlarge the pictures.

I added a hook hanger at the back by chaining the length I wanted and then worked back down the chain by working a single crochet stitch around the chain and attached both ends into the back of the bag keeper. I threaded a piece of ribbon through the casing and tied it at the back with a bow to complete the plastic bag keeper. I present the upcycled thrift store sleeve which has been transformed into a plastic bag holder.

Plarn Apron Pattern

I present my plarn apron which was crocheted from recycled plastic bags. Some time ago I had a request for an apron pattern and put it on my to-do list. I add project ideas to my list all the time in an effort to create a comprehensive library of free recycled craft patterns here at My Recycled Bags. So depending on what pattern you may be looking for, here is the link to all my free patterns. If you don’t find a pattern for something you would like to make, let me know and I will try and create a pattern for you.

Just a word a caution about this plarn apron, don’t use it around an open flame or bbq. It is plastic and would be best used to protect your clothing when washing the dog or maybe working around the house. If you’d like to waterproof it, consider fusing plastic bags to the back side as I did with my sit-upon project. Enjoy and happy crafting to all!

**********************************************************************************************

Free Pattern for Recycled Plastic Bag Apron
Materials needed:
One large ball of plastic bags or plarn cut into 1 inch wide strips
Approx. 60-70 bags

Hooks: N (9 mm) size metal hook & J (6 mm) hook for straps
Description: Recycled Plastic Apron
Apron measures 25-1/2 inches wide and 25-1/2 inches long
with 25 inches long top strap and 20 inches long straps on sides

Directions:
Row 1
Ch 19, Hd in 2nd ch from hook and in ea chain st down to end.