Close

Denim Eyelet Tote Bag

This is my new denim eyelet tote bag. I am so excited about how it turned out. I bought this big piece of denim from a yard sale and set out to make a nice new purse for myself.

It is my first time using eyelets on a tote bag for the handles. In the past I’ve always found it tough sewing the heavy denim handles or straps to the bag. Most of the time your sewing machine doesn’t like sewing through the thick layers of denim so I wanted to try putting in eyelets. They worked out great and I just threaded my denim handle straps through the eyelets and tied a knot at the end to secure each side.

I did take lots of pictures as I created this tote bag and will detail them below for anyone who would like to make their own denim tote bag.

Picture Tutorial for a Denim Eyelet Tote Bag

Materials needed:
One piece of denim 28″ long by 16″ wide
Two denim strips 3″ wide by 38″ long for strap handles
One scrap piece of denim for flap
One piece of lining fabric 28″ long by 16″ wide and extra scrap pieces if pockets are added to lining
One magnetic closure
Thread for denim and lining
Four 7/16″ eyelets
One hammer

Recycled Denim Pots

My blog friend and fellow recycled crafter Carmen is back to share a cool project that she created using old denim from jeans. She used the jeans, along with bandannas and other recycled materials to decorate these flower pots.

Here is another denim pot she covered and used a pocket too. She created a fun gardening gift package with this project. You can see Carmen’s step-by-step photo tutorial here to help you create your own unique recycled denim pot cover.

Recycled Denim Oven Mitt

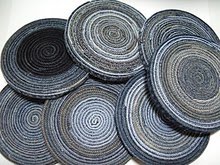
Recycling your old jeans into new and useful things is fun and frugal. The denim recycled from old jeans is very durable and the fabric is very versatile. Oh and the best part, when you recycle denim from materials you have on hand, its FREE.

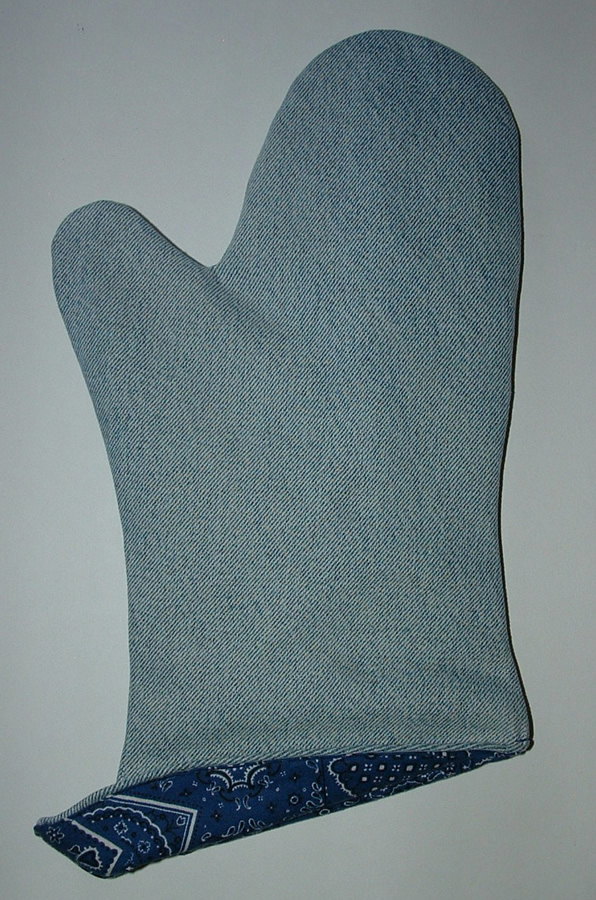
Today I want to share how to make an oven mitt from your old jeans. There are several good tutorials on the Internet showing how to create a homemade oven mitt. (Edit:) Here is a oven mitt template you can use. The original one I used is no longer free so the link has been changed to one that is free.

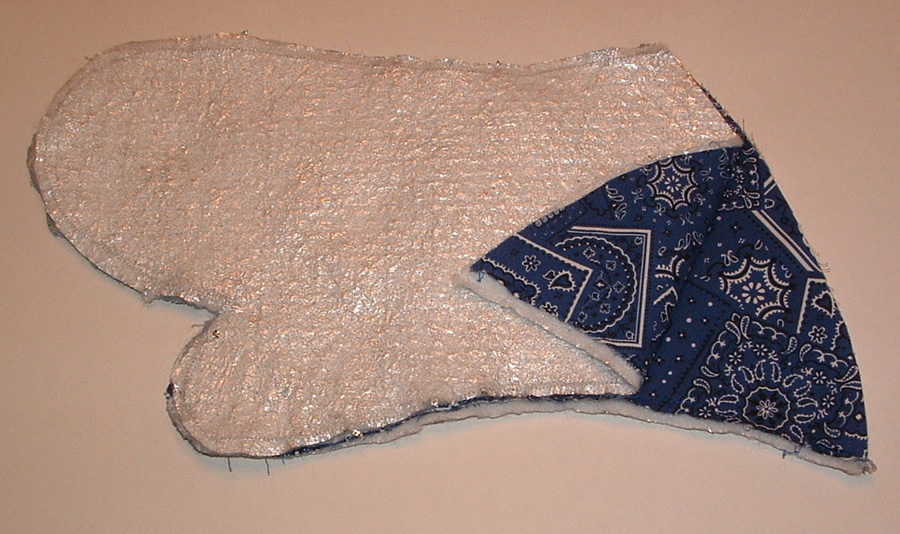
Cut two denim panels using the mitt template. Then cut two from fabric for your lining and two for your mylar batting. If you don’t want to use store bought mylar batting, just cut two pieces from old towels but make sure they are thick so you get enough protection for inside of your mitt.
Click on any photos to supersize

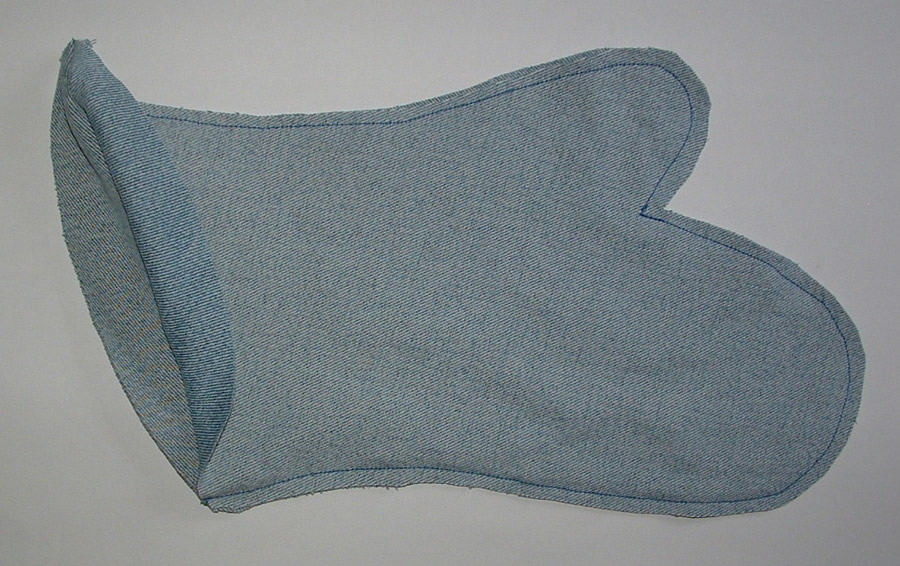
Because denim is so hard to machine sew through several layers, I assembled my oven mitt in two pieces. First pin the two denim panels together with right sides together. Machine sew the two denim panels together using a narrow hem around the mitt. Leave the end hem unfinished at this point. Trim curves and clip at thumb turn. Turn wrong sides to the inside. Using a pencil’s eraser end, push out the thumb and edges. Press with hot iron and turn under a narrow hem along the unfinished edge of the denim mitt shell.

Next put the two fabric lining panels together with right sides together. Then add a batting layer to the bottom and top of your lining insert. Pin in place and machine stitch a narrow hem around the mitt. Leave the end hem unfinished for now. Trim edges and clip at thumb curve but don’t turn. Turn under a narrow hem and press with a hot iron along the unfinished edge of the fabric lining.

Lastly insert your fabric lining inside your denim oven mitt. Check fit and trim edges if necessary so the insert fits nicely inside your denim mitt shell. Match hem edges and pin the two edges together. Machine stitch very close to the edge to enclose the hem of the denim panel and the lining insert. Fold over the edge if desired to show off your fabric lining or add embellishments to the outside of the mitt.


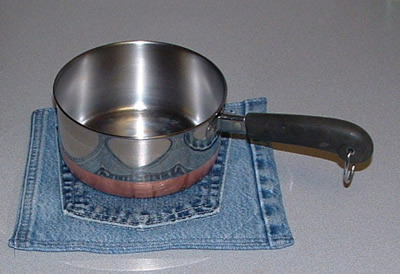
Need a potholder to go along with your oven mitt? You can add a denim potholder that sports a pocket from a pair of jeans to create a cool recycled denim kitchen set.

Recycled Denim Coaster

Got some old jeans? Well how about recycling the hems into some cool coasters. I saw the idea over at Going Green Crafters where they used the hems from old jeans to create denim coasters.

I just love recycling denim and had to try this craft project. I used two inside hems from a pair of old jeans to create my coaster. Trim the edges very close and evenly with a pair of sharp scissors.


Next I spliced my two hem strips together with a thread and needle. Just do a few hidden slip stitches to secure your two denim pieces together. You can click on any of the photos to supersize them.


Using a fabric glue, roll up your denim hem and apply a line of glue along the inside of the strip. Work your way along by tightly rolling up the denim and applying the glue until you get to the end. I added a extra bit of glue at the end and left the coaster to dry for several hours on a flat surface to make sure the coaster would set up nicely.


Here is my finished denim coaster. It measures about 4 inches wide. I left the bottom hem end on it as I thought it added character. You could cut it off or add another hem strip to make your coaster larger as desired. Now I’m ready to go out and enjoy a hot cup of coffee using my new recycled denim coaster.

Recycled Denim Baby Bibs

This month over at the Trash to Treasures group on Ravelry we are having a fabric and clothing scraps challenge. So I broke out some old jeans I have been saving and recycled them into some baby bibs.

The first bib is larger and I used the trimmed side seams from a pair of jeans for the bib ties. This bib is more suitable for an older baby or toddler.


My next bib is smaller and features ribbon for the ties. I thought the ribbon would be gentler for a younger baby’s skin than the denim ties.

Below you will find a picture tutorial showing how I made each of these recycled denim heart bibs.