Close

Bread Bags Upcycled into a Coaster


Here is a quick little crochet project using recycled plastic bread bags. I cut the bread bags into strips just as I do here in my tutorial to create what I call plarn (plastic bag yarn.) I used about 5 or 6 different colored bags to crochet this coaster. It’s a great way to upcycle bread bags and other heavier plastic into a useful item that otherwise might end up in our landfills.

I used an aluminum “H” crochet hook and cut my plastic bags about 3/4″ wide. Starting with a magic circle, Sc 6 times into circle. Don’t join but just mark the beginning of round so you know where it is. Next round, work 2 Sc in each stitch. Next round, work a Sc in next stitch, then 2 Sc in next stitch and repeat around. Next round, work a Sc in the next two stitches, then 2 Sc in next stitch and repeat around. Next round, work a Sc in the next 3 stitches, then 2 Sc in next stitch and repeat around. (Each round increase the number of Sc’s and then do your 2 Sc’s.)

Continue working in rounds and adjust stitches as needed so your coaster lays down flat. I did 6 rounds and finished with a few Sl Sts on last round so my edge was smooth and the coaster is round. I used scraps of plastic about 1-1/2 inch long to make my fringe around the outside of the coaster. I then trimmed the edges so the fringe measures about an inch long. My coaster’s middle is about 4-1/2 inches wide. You can make smaller or larger coasters as desired. Remember when crafting with recycled materials, it’s not an exact science so adjust your pattern as needed. The important thing is to recycle or upcycle that old plastic!
Pink Baby Hoodie


I just have to share my pink baby hoodie sweater that I crocheted for my grandaughter. I enjoyed working the pattern and was very happy with how the sweater turned out. I used a free leaflet pattern from Bernat to crochet this cute little hoodie. The pattern is also available at Bernat online here. If you’d like to see the projects made with this pattern, there is a project page on Ravelry featuring this pattern here.

So if you are looking for a cute and fairly easy baby hoodie pattern, you might want to check out this project.

Recycled Plastic Granny Square Tote Bag

Here is my newest recycled plastic bag tote. It is crocheted using 4 colorful bags for the center granny square motifs. If you have lots of white plastic bags, this is an excellent way to use them up and still make an attractive and stylish tote bag. You only need 4 solid colored bags to crochet this plarn project along with about 30 white plastic bags.

This granny square tote features two longer straps so the bag can be carried over the shoulder. The 4 inch depth makes it handy for carrying books, your lunch, or anything else that you might like to use this cute tote for.

As always, please enjoy my free crochet pattern and happy green crafting to all!
******************************************************************************************************************
Granny Square Motif Tote Pattern

Materials needed:
One large ball of White plastic bag yarn or Plarn approx. 30-35 bags
One plastic bag in each of the center colors: blue, yellow, orange and green

Hooks: N (9 mm) and H (5 mm) size metal crochet hooks

Size: Approx. 5-1/4″ Motif if using 1 inch strips of cut plastic bags
Finished Tote bag measurements: 11 inches wide, 11 inches, 4″ depth, 17″ handles

With center color Ch 4, Sl St to form ring.

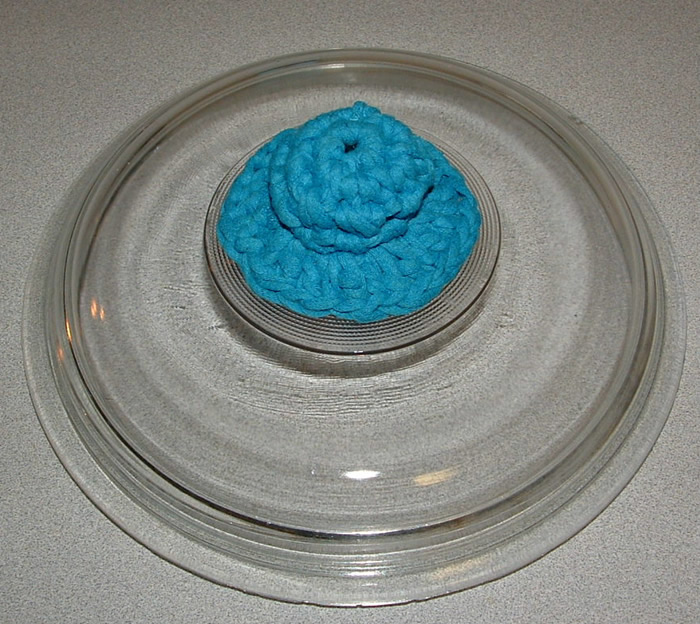
Crocheted Knob Pot Cover

As promised in my last post, here is my crocheted knob pot cover pattern. This project was worked using recycled t-shirts cut into t-yarn or tarn. Tarn is the material created by cutting the t-shirt into a long strip about 3/8″ to 1/2″ wide and then is gently stretched so the tarn curls in on itself. Here is my tutorial for making what I call curled t-yarn.

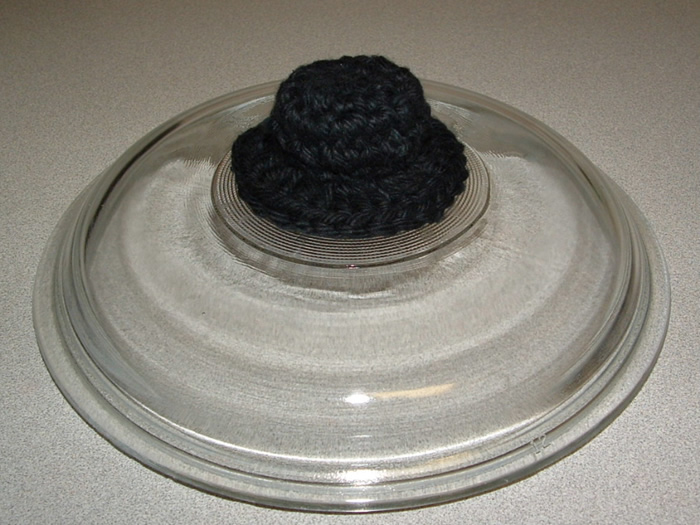
For those people who would like to crochet this knob cover using rug or chunky yarn, here is a picture of my lid cover crocheted using some black rug yarn. I have included the option for crocheting with rug yarn in the free pattern below.

Depending on your knob size, you may need to adjust your stitches in the crochet pattern posted. The important thing is to check the fit of your cover as you crochet the rounds so your knob cover fits snugly and doesn’t slip off.

I just love my knob cover and use it all the time on my old glass crockpot lid. It is so nice now to just slip the cover over the knob and I can lift the lid without having to worry about it being too hot or slipping out of my hand.

I hope you enjoy this free pattern and want to take this opportunity to say Happy New Year.
Have a wonderful 2010 everyone!

*****************************************************************************************************************************

Crocheted Knob Pot and Lid Cover Pattern

Materials needed:
Small amount of tarn (t-shirt yarn) cut into 3/8-1/2 inches inch wide strips and gently pulled to curl your tarn

Option: Rug yarn or a chunky yarn can be used in place of tarn see pattern changes at the bottom.
Hook: H (5 mm) U.S. size metal crochet hook

Finished knob cover is 1-3/4 inches wide at top and 3 inches wide at base

Rnd 1
Using t-yarn / tarn or rug yarn make a magic circle and Sc 7 times into circle. Do NOT turn your work in this project. Mark so you know where the round starts as you do not join in this project unless specially told to but rather just continue working in rounds.